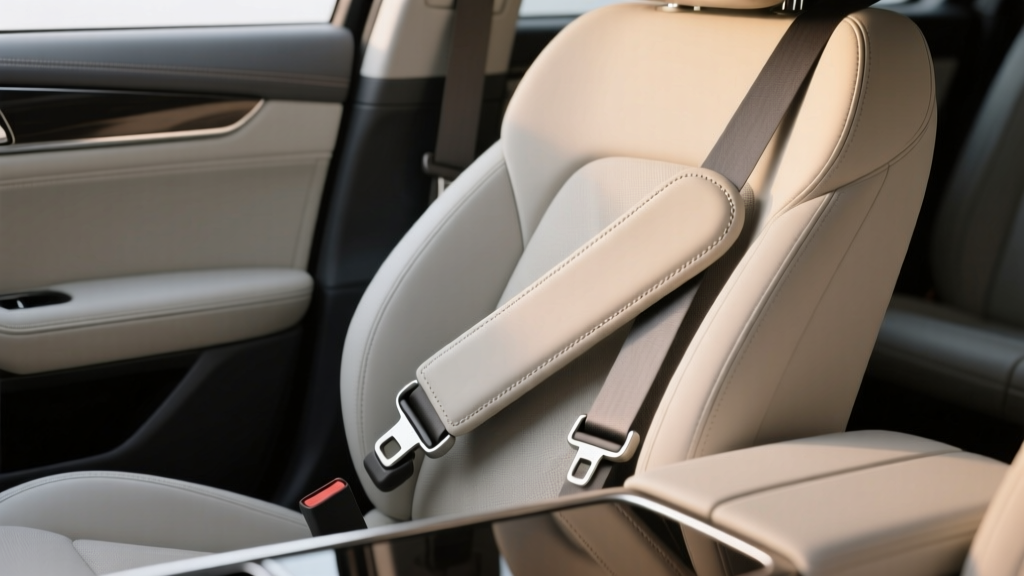
Seat Belt Cover Installation: Easy Steps (2026)
Seat belts do a life-saving job, but the part that touches you every day?the webbing across your shoulder and chest?can be surprisingly uncomfortable. Scratchy edges, chafing on bare skin, irritation on long drives, and that constant rubbing on your neck are common complaints, especially in smaller cabins or when the belt height isn?t perfectly adjusted. A seat belt cover is one of the simplest interior add-ons you can install to make daily driving more pleasant.
Beyond comfort, seat belt covers also help protect your clothing and the seat belt itself. They can reduce wear from repeated friction, hide minor stains, and add a bit of personal style to your cabin. For families, they can make belts feel less ?harsh? for older kids and teens (while still requiring proper belt fit). For enthusiasts, they?re an easy way to match an interior theme?black leather, sporty red stitching, or soft neoprene for an OEM-plus look.
This guide walks you through choosing the right cover, installing it properly, and avoiding the mistakes that can reduce safety or cause annoying slipping. If you want a cleaner look, better comfort, and a more refined daily drive, you?re in the right place.
What a Seat Belt Cover Does (and What It Shouldn?t Do)
A seat belt cover is a sleeve or pad that wraps around the belt webbing?usually near the shoulder area. Its job is to add a softer contact surface and (sometimes) a bit of cushioning.
Benefits you can expect
- Comfort: Less rubbing on the neck and collarbone, especially on long trips.
- Reduced belt abrasion: Helps minimize fuzzing and wear in a high-contact zone.
- Style: Adds texture and color; can match seat covers, steering wheel wraps, or floor mats.
- Temperature buffer: Some materials feel less icy in winter and less hot in summer than bare webbing.
What a cover should NOT do
- Interfere with retraction: The belt must retract smoothly every time.
- Change belt routing: It shouldn?t push the belt off your shoulder or onto your neck.
- Add bulk near the buckle or latch: That can affect locking and emergency locking behavior.
- Mask unsafe belt fit: A cover can improve comfort, but it won?t fix incorrect belt height or seating position.
Choosing the Right Seat Belt Cover: Materials, Closures, and Fit
Before you install anything, pick a cover that matches your car?s belt width and your goals. Most modern seat belts are around 47?49 mm (about 1.85?1.93 inches) wide, but it?s worth measuring.
Material comparison (real-world pros/cons)
- Neoprene: Soft, slightly cushy, and durable. Great for daily drivers and families. Can trap heat in very hot climates.
- Velour/microfiber: Plush feel and very comfortable on skin. Can show lint and may wear faster with heavy use.
- Leather/leatherette: Premium look and easy wipe-down. Can feel warm in summer or stiff in winter; look for smooth edges and quality stitching.
- Sheepskin/faux fur: Extremely soft and cozy, popular for cold climates. Bulkier; can interfere with retraction if oversized.
- Cotton/cloth sleeves: Breathable and budget-friendly. Usually less structured and more likely to slide if the fit is loose.
Closure styles
- Hook-and-loop (Velcro): Most common, easy to install and adjust. Choose strong stitching and wide hook-and-loop strips to prevent peeling.
- Zipper: Cleaner look and less likely to open accidentally. Make sure the zipper pull won?t rub your neck.
- Snap buttons: Quick and tidy, but can create pressure points if positioned where your shoulder rests.
- Slip-on tube: No closures, very clean. Requires removing the belt anchor on many vehicles?often not recommended for beginners.
Quick buying checklist
- Fits your belt width (measure if unsure).
- Has smooth seams and no hard edges that could scratch.
- Stays put without needing to wrap around the belt multiple times.
- Doesn?t add excessive thickness (especially for smaller drivers who sit close to the wheel).
- Easy to clean (machine washable or wipeable is a plus).
Tools and Prep: What You?ll Need Before Installation
Most seat belt covers install in minutes with no tools. A little prep makes the result cleaner and helps the cover stay in place.
Recommended items
- Seat belt cover(s)
- Mild interior cleaner (or warm water with a drop of dish soap)
- Microfiber towel
- Optional: small piece of silicone-free fabric grip tape (only if needed to prevent sliding, and only on the cover?not on the belt webbing)
Before you start
- Park safely on level ground with the engine off.
- Inspect your seat belt for fraying, cuts, melted spots, or stiffness. If you see damage, skip the cover and address the belt first.
- Clean the belt section where the cover will sit. Dirt and skin oils can make covers slide.
Step-by-Step Seat Belt Cover Installation (Hook-and-Loop / Velcro Style)
This is the most common style and the easiest for most vehicles.
Step 1: Find the ideal placement
- Sit in the driver?s seat (or the seat you?re installing for) in your normal driving position.
- Buckle the belt and let it settle naturally across your shoulder and chest.
- Pinpoint the contact zone that causes irritation?typically where the belt touches the side of your neck or collarbone.
Practical tip: Mark the general location with a small piece of painter?s tape on the cover (not the belt) once you find the sweet spot. This helps you replicate the same position on the passenger side.
Step 2: Open the cover and wrap it around the belt
- Unbuckle the belt while holding the belt webbing so it doesn?t fully retract out of reach.
- Open the cover completely so the inside faces the belt.
- Wrap the cover around the belt with the seam or closure facing away from your neck (usually toward the door side).
Step 3: Align and secure the closure
- Center the cover so it?s evenly wrapped and not twisted.
- Press the hook-and-loop strips together firmly from top to bottom.
- If the cover has multiple fold lines, avoid bunching; a smooth wrap reduces slipping.
Step 4: Test retraction and movement
- Slowly feed the belt back toward the pillar and pull it out again.
- Confirm the belt retracts smoothly without sticking.
- Buckle up again and verify the cover sits on your shoulder?not against your neck and not down on your upper arm.
Real-world example: If you drive a compact sedan and sit closer to the wheel, a thick plush cover can ride up toward your neck when you turn the steering wheel. Moving the cover 1?2 inches lower on the belt often fixes it without sacrificing comfort.
Step-by-Step Installation (Zipper or Snap-Closure Covers)
These covers can look more ?OEM? but require careful placement so hardware doesn?t create pressure points.
Zipper style
- Position the cover on the belt with the zipper facing outward (away from your neck).
- Start the zipper at one end and close slowly, making sure the belt webbing isn?t pinched.
- Run your fingers along the cover to confirm a flat, even fit.
Snap style
- Wrap the cover around the belt and align snaps.
- Close snaps from top to bottom to keep the material straight.
- Check that snap backs aren?t located where your shoulder presses during normal driving.
Recommended Seat Belt Cover Types (Best Use Comparisons)
Rather than focusing on a single brand, here are the best-performing styles for common needs. When shopping, look for strong stitching, consistent padding, and closures that won?t scratch.
Best for daily commuting
- Neoprene hook-and-loop cover with moderate padding
- Why it works: durable, easy to clean, and usually stays in place
Best for sensitive skin or long road trips
- Microfiber/velour wrap with wide closure panels
- Why it works: softer against skin, less friction on the neck
Best for premium interior styling
- Leatherette zipper cover with hidden zipper track
- Why it works: upscale look, wipe-clean finish, tidy fit
Best for hot climates
- Breathable cloth or perforated synthetic cover
- Why it works: less heat retention than thick plush materials
Common Mistakes to Avoid (Comfort and Safety)
- Installing the cover too close to the latch plate: Keep the cover on the shoulder zone, not near the buckle hardware.
- Choosing a cover that?s too bulky: Oversized pads can reduce belt retraction or push the belt off your shoulder.
- Letting the cover sit on your neck: If it migrates upward, reposition it lower and adjust your belt height (if your car has an adjustable upper anchor).
- Ignoring retraction issues: If the belt doesn?t retract smoothly every time, remove the cover and switch to a slimmer design.
- Covering damaged webbing: A cover is not a fix for fraying or cuts. Replace or service the belt system first.
- Using adhesives on the belt webbing: Avoid glues, tapes, or anything that can contaminate fibers. If extra grip is needed, apply a grippy layer to the inside of the cover only, and keep it minimal.
Pro Tips for a Cleaner Look and Better Fit
- Match both sides: Install driver and passenger covers at the same height for a symmetrical interior.
- Align seams outward: Keeps the contact surface smooth against skin and reduces irritation.
- Check after one week: Covers can shift slightly as the material breaks in; a quick re-center usually locks in the ideal spot.
- Mind child seat setups: If you frequently reach for the rear seat belt, avoid oversized covers that catch on your hand or snag during quick buckling.
- Pair with proper belt adjustment: If your vehicle has an adjustable shoulder anchor, set the height so the belt crosses mid-shoulder?then position the cover.
FAQ: Seat Belt Cover Installation and Use
1) Are seat belt covers safe to use?
When properly fitted, slim seat belt covers that don?t interfere with belt retraction or routing are generally fine for comfort. The key is that the belt must lie flat across your shoulder and chest and retract normally. If a cover causes sticking, bunching, or changes belt position, remove it and choose a different style.
2) Where exactly should I place the seat belt cover?
Place it in the shoulder contact area?typically the upper third of the belt where it rests across your collarbone/shoulder. Avoid placing it near the buckle, latch plate, or retractor mechanism.
3) My seat belt cover keeps sliding. How do I stop it?
First, clean the belt webbing and the inside of the cover. Then tighten the closure so it wraps snugly without wrinkles. If it still slides, choose a cover with wider hook-and-loop panels or a zipper design that grips more evenly.
4) Can I wash my seat belt cover?
Most cloth, microfiber, and neoprene covers can be hand-washed with mild soap and air-dried. Leatherette usually wipes clean with a damp microfiber towel. Always follow the care label, and make sure it?s fully dry before reinstalling to avoid odors.
5) Do seat belt covers work for kids?
They can improve comfort for older kids/teens who fit the adult belt properly. For younger children who need a booster, focus on correct booster use first so the belt fits across the shoulder and hips correctly. A cover should never be used to ?make? an adult belt fit a child who isn?t sized for it.
6) Will a cover fit any vehicle?
Most covers fit most modern belts, but not all. Measure your belt width and check the product?s sizing. Some sporty or older vehicles have narrower or stiffer webbing, and some luxury cars have thicker belts that need a roomier wrap.
Conclusion: Your Next Steps
Installing a seat belt cover is a quick interior upgrade that pays off every time you drive?especially if you deal with neck rub, long commutes, or just want a more finished cabin look. Pick a cover material that matches your climate and comfort needs, position it on the shoulder contact zone, and test belt retraction before calling it done.
- Choose a slim, well-stitched cover with a secure closure
- Install it with the seam/closure facing away from your neck
- Verify smooth retraction and proper belt routing
- Re-check placement after a week of normal driving
For more practical interior upgrades?seat cover fitment, cabin cleaning routines, and comfort-focused accessories?explore the latest guides on carinteriormix.com.